Nowadays, with lots of online traffic and everyone trying to get their attention by means of photos and videos, it has never been more difficult to ensure your content is noticed among the rest. As a person who has been working in the digital media and photo editing field over the course of several years, I am perfectly aware of the fact that with only one easy trick, ordinary-looking visuals can be turned into highly appealing, professional-looking ones, the blur background technique.
Whether it’s a social media post, product photo, YouTube thumbnail, or a portrait, blurring the background helps direct attention to your subject. It removes distractions, sharpens the focus, and gives your images a clean, professional look—no fancy gear or expert editing needed.
In this article, I’ll explain exactly what background blur is, why it’s essential for content creators today, and show you easy ways to achieve it using different tools — even if you’re just starting. Plus, I’ll share expert tips to help you make your photos and videos truly shine.
What Does “Blur Background” Mean, Exactly?
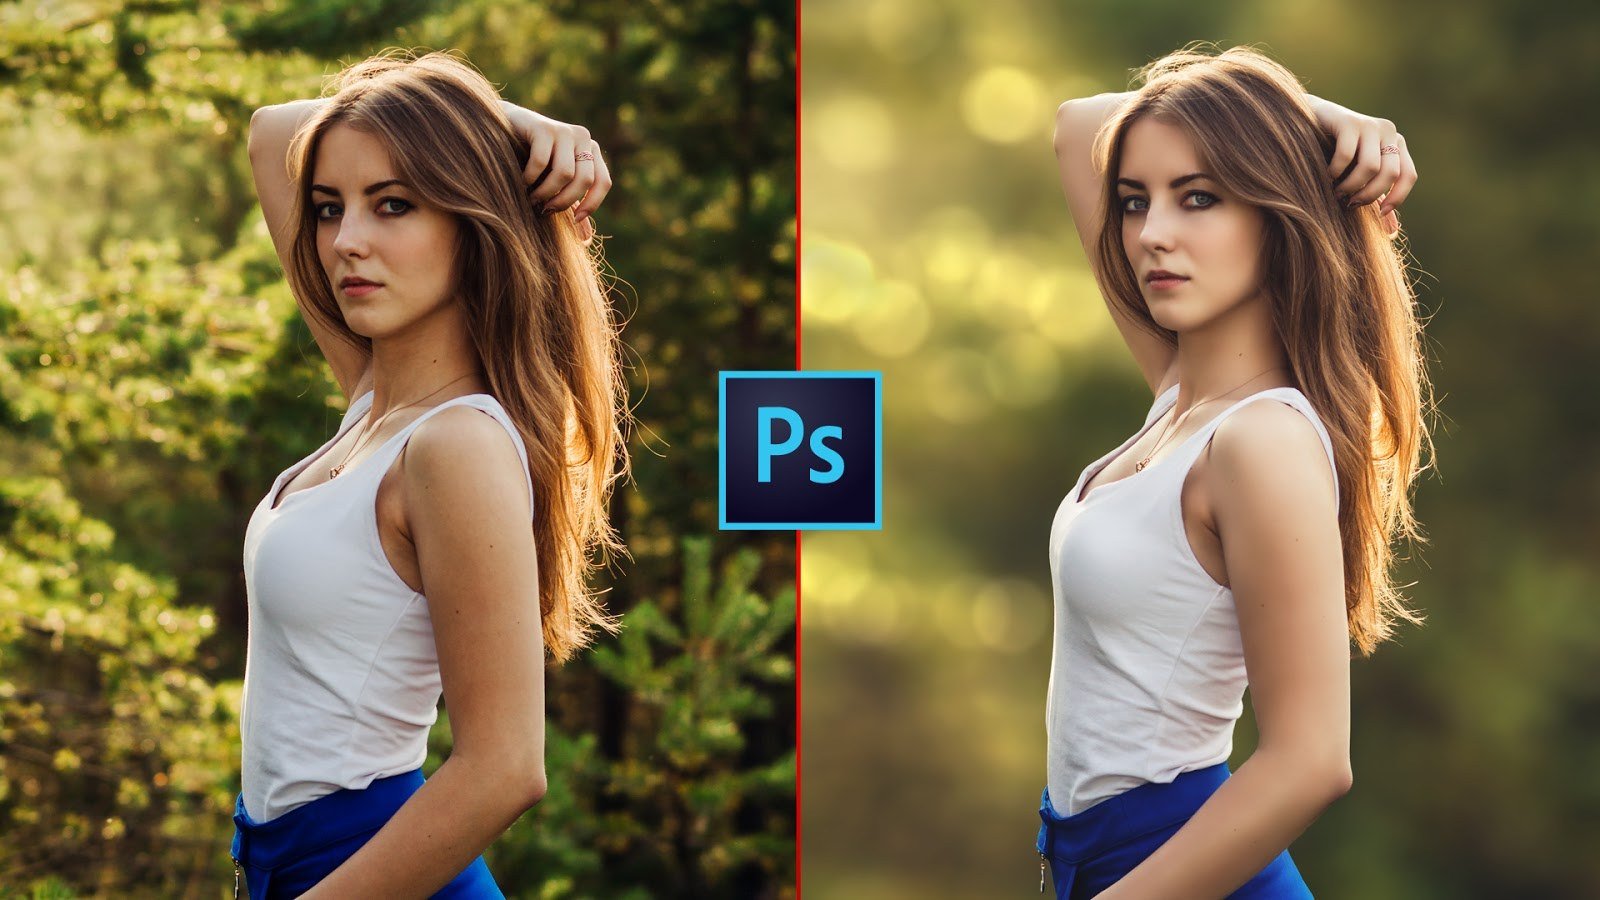
Blurring the background is where the object of an image or video is sharp, and everything that surrounds it features as soft and out-of-focus. You have probably observed such an effect in professional photos or movie scenes. It is a kind of supplementary thing, it pulls out the distractions and makes the viewer concentrate on what is important.
Nowadays due to apps and smart cameras, everyone can blur background, even using a smartphone.
Why Blur the Background?
To Look Professional
Have you ever noticed that portraits shot through DSLRs are a bit creamy and soft with the background? Not only is it beautiful, but it also makes your subject stand out. When creating anything on YouTube or even on product listings, it is good to have the background blurred to provide it with a smooth finish.
To Remove Distractions
Messy room? Crowded street? No problem. There is a blurred background that conceals all the noise, but gives the main focus on you or your product.
To Create Mood and Focus
Blurring may stir an emotion into a shot. The depth of field is shallow, therefore making a photo look more intimate or dramatic. It leads the eye and informs the viewer where to focus the eyes.
Ways to Blur Background in Photos and Videos
Let’s break down different ways to get that soft, dreamy look.
1. Use Portrait Mode (Smartphones)
Most iPhones and Android phones have Portrait Mode built-in.
Just open the camera, switch to “Portrait,” and tap on your subject. The background automatically blurs.
2. Online Background Blur Tools
Some websites, like Adobe Express, let you upload photos and apply the blur effect in seconds.
Example workflow:
- Upload your image
- Select the subject
- Choose the blur background option
- Adjust the blur strength
- Download and save your new photo
Simple and fast—great for social media posts or thumbnails.
3. Blur Video Backgrounds
Apps like CapCut, VN Editor, or Adobe Premiere Pro allow you to blur the background in videos.
Here’s how:
- Upload your video
- Duplicate your video layer
- Apply a Gaussian blur to the bottom layer
- Use masking to keep your subject sharp
- Export your final video
Perfect for creators who want to elevate their videos without hiring a pro editor.
Tips to Get the Best Results When You Blur Background
- Choose the right image. If your subject and background have contrast, the blur looks more natural.
- Don’t overdo it. Too much blur can make your photo look fake.
- Use masks carefully. When editing manually, clean masking ensures your subject stays sharp.
- Experiment with depth. A subtle gradient blur gives a more realistic, professional finish.
Pros and Cons of Background Blur
Advantages
- Directs attention to your subject
- Reduces distractions in cluttered spaces
- Looks professional and clean
- Adds visual depth to your content
Disadvantages
- Overuse can ruin naturalness
- Auto-blur tools sometimes blur the wrong areas
- Editing videos requires more time and skill
FAQs: Everything You Need to Know About Blur Background
1. Can I blur the background after taking a photo?
Yes! You can use editing apps or online tools like Adobe Express. Upload your photo, select your subject, and apply the blur background effect.
2. Which is the best free app for background blur?
Adobe Express and many other apps are great. Each offers easy-to-use tools that let you control how much blur you want.
3. Can I blur background in a video call (Zoom, Meet, Teams)?
Absolutely. Most modern platforms offer a built-in option to blur background in real-time during your call.
4. Will blurring my background lower photo quality?
Not if you use good tools. Just avoid overly aggressive blurring that smudges edges.
5. Is it possible to blur only part of the background?
Yes. Advanced tools like Photoshop or video editors allow selective blurring using masks and layers.
Final Thoughts
Background blurring is one of the easiest and most effective tricks of improving your pictures or videos. There are distractions you want to remove, you want to add some depth or you simply need to give your content a more professional finish, the blur background effect ensures that your subject stands out.
You do not really require costly software or specialized ability to start. Beautiful and blurred backgrounds may be done by anyone in a matter of seconds provided that they had the necessary tools. The Adobe Express blur background tool is one of the greatest options. It is free, in-depth, and works on creators who wish to achieve mesmerizing outcomes without breaking a sweat. Therefore when you edit an image or prepare the content to be posted, experiment with background blur. It could be the little change that may make your images standard to outstanding.